
You finish a quick product photo and notice a broad shadow across the white tabletop. Brightening the whole image clears that dark patch but also washes out the mug and makes its base look detached from the surface. To remove a shadow from a photo cleanly, isolate the unwanted dark area and keep the shadows that explain the subject's shape and position.
The example here uses a red mug, but the same decision applies to a phone shadow over a document, a distracting shade on clothing, or a dark patch in a portrait. Start by deciding which shadow is actually the problem.
Separate an Unwanted Shadow From Useful Depth
Not every dark area should disappear. Shadows can show that an object is curved, touching a surface, or lit from a particular direction.
Shadow type | What it explains | Typical editing goal |
|---|---|---|
Unwanted cast shadow from another object | An obstruction outside your intended composition | Reduce or remove it locally |
Contact shadow beneath the subject | Where the subject touches the surface | Usually preserve believable grounding |
Form shadow on the subject | The subject's own shape under the light | Lift only enough to reveal useful detail |
In the mug scene, the broad diagonal tabletop shadow is the distraction. The small shadow directly beneath the base and the darker side of the red glaze help the mug look three-dimensional.
My acceptance rule is that the mug must still belong on the table after the repair. An evenly white background is not an improvement if the product appears to float.
Remove the distraction, not every dark pixel. Decide which shadow to target before using a tool that offers to erase or relight the entire scene.
Check Whether the Shadow Still Contains Detail
Zoom into the dark area before editing. Can you still see paper texture, fabric weave, skin detail, or the tabletop surface? A shadow with recorded detail gives you something to lift; a featureless dark patch may require reconstruction or a different source.
Also inspect its boundary. A soft shadow changes gradually. A hard edge may need careful mask refinement so the correction does not leave a bright outline or a new stripe.
For the mug photo, follow the shadow across the empty tabletop and stop where it approaches the product. If the unwanted shade overlaps the mug's own shadow, do not assume both should receive the same adjustment.
Save an untouched original. If you have another frame with cleaner lighting, compare it before starting a difficult repair. Moving the camera or the object that casts the shadow can be the simpler solution when reshooting is possible.
Choose Tonal Correction Before Replacing the Surface
If detail remains in the shadow, start by adjusting light locally. A removal brush that replaces the area can change texture unnecessarily when the actual problem is just brightness.
Use this decision sequence:
Lift a shadow with visible detail using a targeted tonal adjustment.
Refine its edge and check color consistency.
Consider a local patch or reconstruction only when the surface cannot be made usable from the recorded information.
Choose another photo when the missing area includes a detail you cannot verify.
Adobe's highlights-and-shadows guide explains why tonal range contributes to depth. In this task, the practical aim is to rebalance the unwanted patch while retaining the subject's useful shading.
A one-click shadow remover may provide a convenient starting point. Fotor's shadow-removal page is one such entry point, but its promotional examples do not establish how your own surface or product will be preserved.
Build a Mask Around the Unwanted Area
A mask defines where an adjustment applies. It lets you lighten the tabletop patch without raising the brightness of the mug, white highlights, or the rest of the room.
A global Shadows slider can affect other dark regions too, including the mug handle and its underside. That is useful when the entire photo needs tonal rebalancing, but it does not isolate an unwanted cast shadow. Check which problem you have before choosing the control.
Toggle the local correction off and on while watching the mug base. If the base becomes brighter along with the unwanted patch, inspect the mask coverage before increasing the adjustment again.
Adobe's Lightroom mobile masking instructions describe creating a Brush mask with controls for size, feather, and flow. Use a soft transition that matches the shadow you are correcting.
Open the photo and choose Masking → Create new Mask → Brush.
Set a brush size suited to the dark area, with a feathered edge for a soft shadow.
Paint over the unwanted patch while keeping the mug and its base outside the mask.
Use restrained tonal adjustments to make the patch closer to its surroundings.
Refine or erase mask coverage where the correction spills onto protected areas.
A lower flow can help build coverage gradually, as Adobe's guide notes. It does not replace checking where the mask begins and ends.
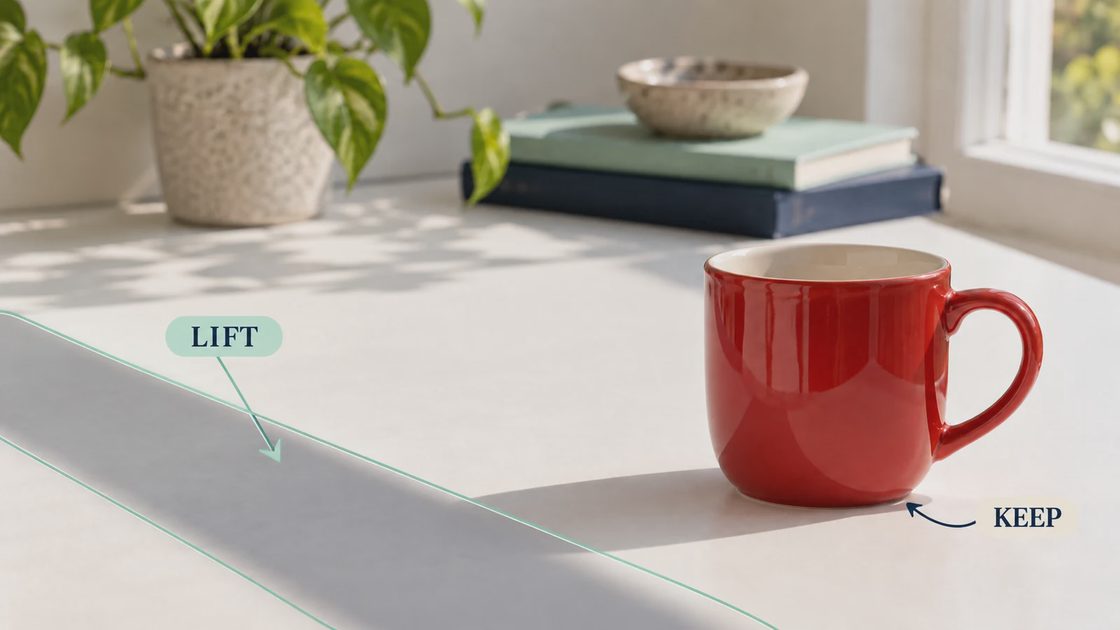
The selection illustration separates the broad shadow to lift from the contact shadow to keep. It is an editing plan, not a screenshot proving a completed repair.
If the unwanted shadow crosses onto a different material, consider separate masks. The white table and red glaze may need different brightness and color corrections even though one cast shadow reaches both.
Match Brightness and Color Across the Boundary
Increase the local correction gradually while watching both the darkest region and its edge. The correct endpoint is a believable surface, not necessarily identical brightness everywhere.
Common boundary problems need different responses:
Bright halo: The mask extends into an already bright area, or the edge correction is too strong.
Dark rim: The selection missed part of the original shadow boundary.
Visible band: The correction changes too abruptly across a soft transition.
Color mismatch: The lifted patch has a different tint from the surrounding surface.
Refine mask coverage first when the shape of the problem follows the mask. Do not keep changing global exposure to hide a local boundary defect.
If the patch looks bluer or warmer after lifting, review its local color as well as brightness. Match the material under the same apparent light, and avoid making the corrected region more neutral than the rest of the scene.
For a portrait, preserve natural modeling across the face rather than flattening every cheek or eye-socket shadow. If the unwanted shade crosses important facial detail that the source does not show clearly, a better-lit frame may be the more reliable choice.
Protect Texture and the Contact Shadow
After lifting the unwanted area, inspect the material. A clean white patch can look wrong if the rest of the tabletop has subtle grain or if a paper surface suddenly becomes perfectly smooth.
What you notice | What to reconsider |
|---|---|
Subject looks like it floats | The contact shadow was erased or weakened too far |
Surface becomes waxy or blurred | Smoothing or replacement removed texture |
Grain or stains repeat | A patch was copied without enough source variation |
Mug looks flat | The subject's own form shading was lifted too aggressively |
Dark patch becomes noisy or blotchy | The source cannot support that much brightening cleanly |
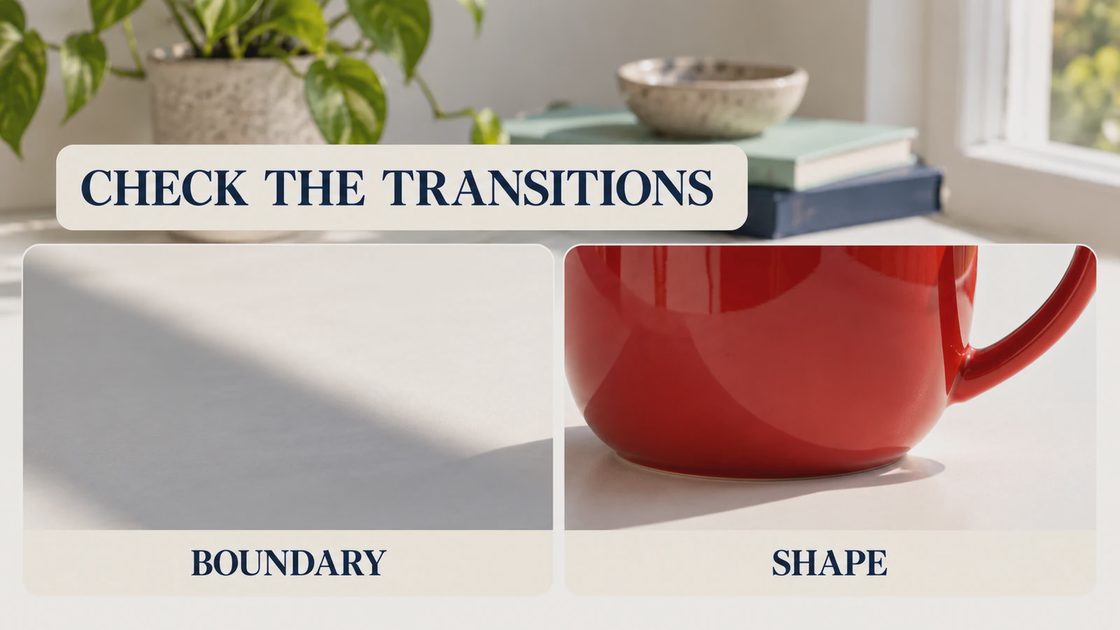
The detail views identify the transition and grounding cues to inspect. They are not a before-and-after comparison of shadow-removal tools.
If a small empty-background patch still needs repair, use matching nearby texture and check its direction and scale. Avoid rebuilding the product's shape to solve a background problem.
When the shadow and the product's base are tightly intertwined, accept a modest remaining shadow if it looks natural. A smaller correction can preserve a more believable scene than a perfect-looking white cutout.
Check the Export and Improve the Next Capture
Inspect the actual exported image at its intended display size. Recheck the unwanted patch, mask boundary, mug curvature, and small shadow beneath the base. Keep the original and edited files separate.
If you can reshoot, identify what cast the unwanted shadow and move it or change the camera position. Softer, more even illumination can reduce the repair needed, while still leaving enough directional light to show form.
For your next shadow repair, mark one dark area to lift and one grounding shadow to preserve. Judge success by whether both the surface and the subject remain believable.